Installation
Please make sure the machine meets the System Requirements before continuing.
Run the setup executable to begin the installation wizard.
Download Installer
The Download Installer dialog indicates the missing required prerequisites and automatically downloads and installs them.
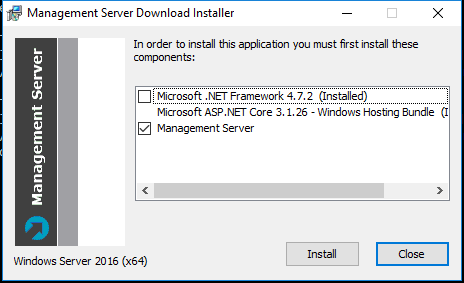
Click the Install button to continue.
Welcome
After the prerequisites are installed, the CMon installation wizard's Welcome dialog is displayed.

Click the Next button to continue.
End-User License Agreement
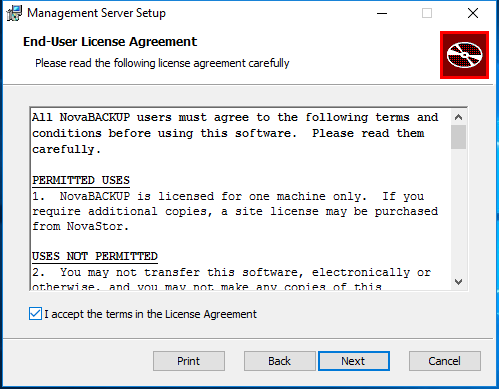
Check-mark the I accept the terms in the License Agreement check-box and click the Next button to continue.
Custom Setup
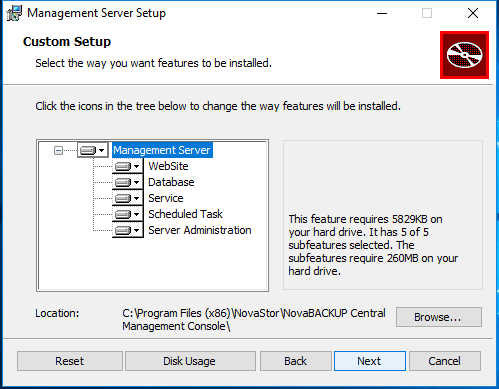
Click the Next button to continue.
SQL Database Server Provider
Select the server provider on which the database will be installed.
It is required to select Microsoft SQL Server in CMon 19.8+. Do not select SQlite.

Click the Next button to continue.
SQL Database Server Instance
If Microsoft SQL Server was selected, the SQL Database Server Instance dialog is displayed.
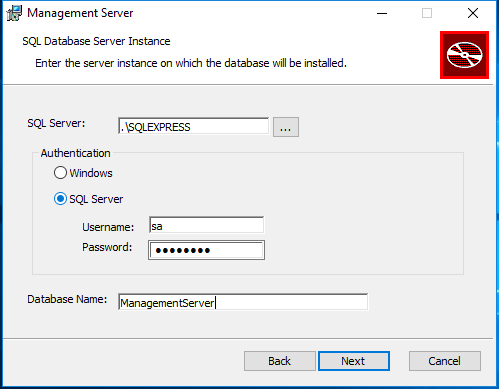
Enter the required values and click the Next button to continue.
Note
If the Microsoft SQL Server is on a remote machine, Windows Management Instrumentation (WMI) must be enabled for remote communication through the firewall.
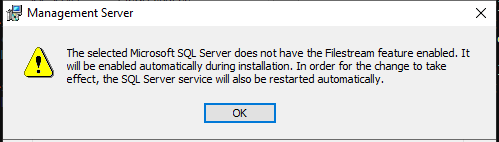
Warning
If the Microsoft SQL Server Filestream feature is not enabled on the selected instance, it will be enabled automatically during installation. In order for the change to take effect, the SQL Server service will also be restarted automatically.
SQL Database Server Windows Authentication
If Microsoft SQL Server was selected, the SQL Database Server Windows Authentication dialog is displayed.
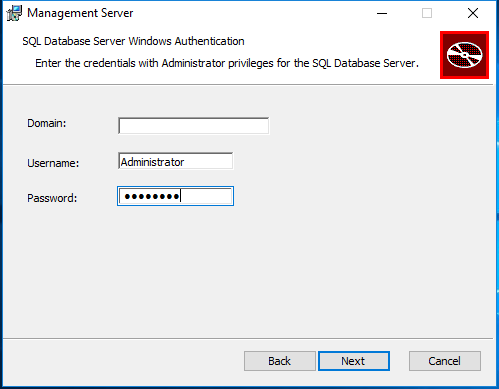
Enter the required values and click the Next button to continue.
Web Server Provider
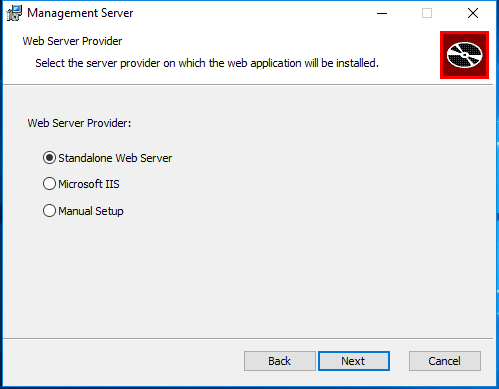
Select the server provider on which the web application will be installed.
Microsoft IIS is recommended for better performance, an improved experience, and greater security.
Web Server Configuration
If Standalone Web Server is selected, the Web Server Configuration dialog is displayed.
The setup installer will automatically open this port on the Windows firewall.
Make sure network traffic on the selected port is allowed to enable accessing the CMon web application from a web browser.

Click the Next button to continue.
IIS Web Application
If Microsoft IIS was selected, the IIS Web Application dialog is displayed.
Make sure network traffic on the web server ports are allowed to enable accessing the CMon web application from a web browser.
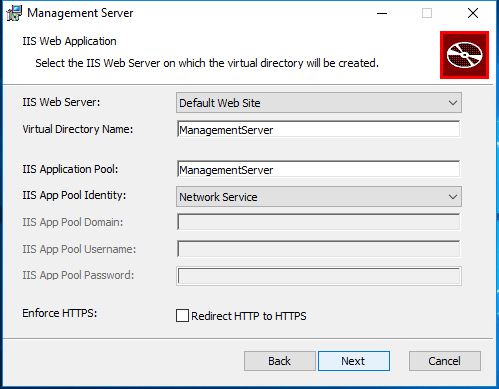
Check-mark the Redirect HTTP to HTTPS check-box to enforce requests to use HTTPS.
Using HTTPS is recommended for greater security.
The IIS Web Site in Microsoft IIS must be configured to support HTTPS.
Enter the required values and click the Next button to continue.
Management Server
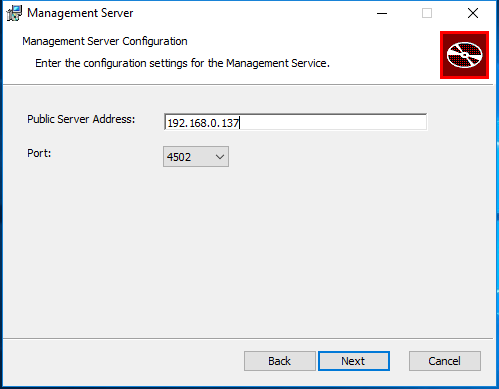
The Public Server Address (IP address, DNS, or computer name) and Port need to be configured in backup client agents in order to connect to CMon.
The setup installer will automatically open this port on the Windows firewall.
Make sure network traffic on the selected port is allowed to enable backup client agents from communicating with the CMon service.
Click the Next button to continue.
Ready to Install
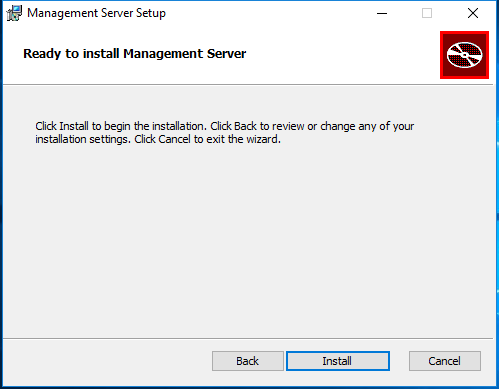
Click the Install button to start the installation.
Finish
After a successful installation, the Finish dialog is displayed.
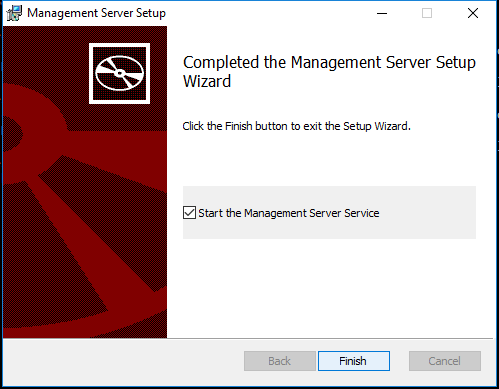
Check-mark the check-boxes to start the required services.
Click the Finish button to exit the installation.
Application Installed Successfully
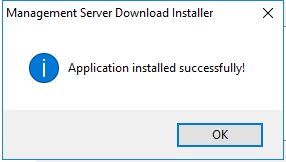
Click the OK button to close the installer.